Dear human,
What you should first recognize is that you are aging, minute by minute. One of life’s only certainties.
This means you are still among the living for the time being. And so allow me to offer a few words of advice.
You may very well experience crow’s feet and pimples at the same time. And they really don’t have a proper cream for this. Also, you’re probably going to develop some back or knee pain, so enjoy unencumbered sex, or squats, or both, while you can.
If you live alone, you will—at some point—worry about choking on your dinner and recognize things could end very badly, and swiftly for you at the hand of, say, a poorly groomed salmon. If you are someone who has never lived alone, you might think this sort of thing is silly. Or dramatic. Or neurotic. It’s not, so don’t be an asshole.
You’ll probably need to learn to love something a little less along the way too. It might be gin martinis, or a man, or money, or cheeseburgers. These things can be vampires under the right circumstances.
A sense of humor is indispensible. Knowing someone with a boat is helpful too, but it may require wearing horizontal stripes. You’ll have to weigh the pros and cons.
If you eat meat, you should know how to roast a chicken. It is generally cheap, easy to learn, and a reminder that your food came from something with legs and, formerly, a neck.
Breathe.
If you are on the sidewalk, do not take up the whole space. If you are on the metro, do not usurp the subway pole. If you are on a bike in the city, stop at red lights. And if you are in a car, remember, we can still see you.
It is okay to say, “I don’t know.” Context is everything. And try not to lie, you will have less to remember.
Celebrate your birthday. You only get so many. And, whenever possible, make cake. For you and for those you love. You never know when it could be the last slice.
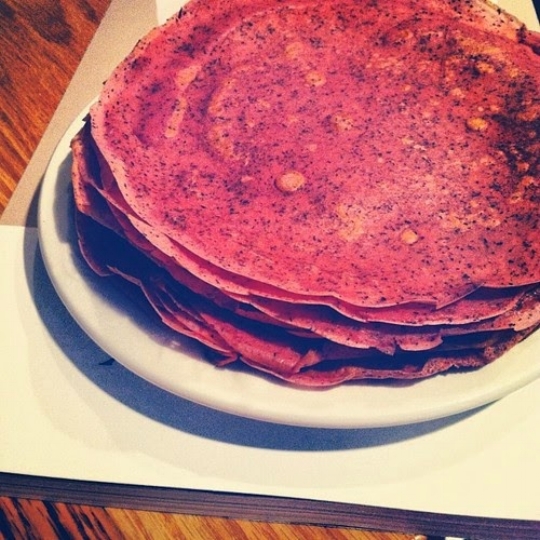
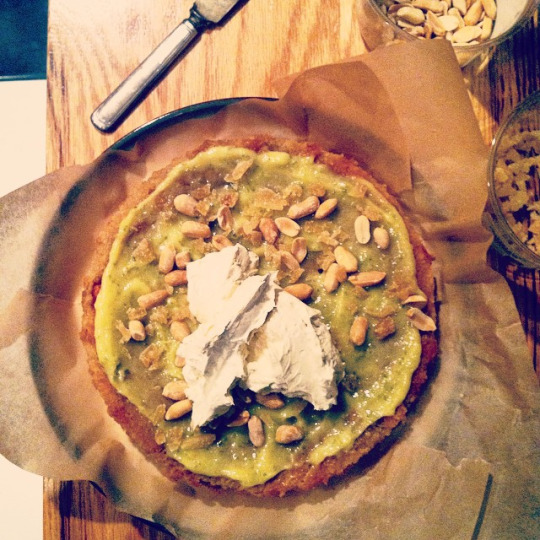
Now, for the cake. It starts with lime curd. Proceeds with a ginger beer syrup that could probably get coaxed into jelly with the right amount of gelatin. Finishes with salty peanuts and crystalized ginger topped by meringue buttercream with five shots of Island rum forced in.
There is also three layers of vanilla cake infiltrated with crunchy buttered nuts to contend with.
I call it a barstool cake. Which, if I am honest, you might need after you are done with the recipe. It took me over four goddamned hours to make start to finish. But it is worth it. Why are nuts included? Because bar nuts are awesome, silly.
The cake was wholeheartedly inspired by a Dark and Stormy cocktail. It has notes of spice and strength. It is not overly sweet, but it is no diet dessert to be certain. And it is just salty enough to keep things interesting.
My birthday-hating brother had a whole piece. And said it was good. Also, my friend David volunteered to eat it with his hands. It did not work out that way, but this sort of behavior would not have been prohibited.
Both life and cake are fleeting, enjoy them as much as you can.
Dark and Stormy Triple-Layer Birthday Cake
Ingredients:
for the lime curd
(Adapted from Barefoot Contessa Parties! by Ina Garten)
- 2 limes
- ¾ cup sugar
- ¼ cup unsalted butter
- 2 eggs, room temperature
- pinch of kosher salt
- for the ginger beer syrup
- 12 ounces ginger beer (I prefer Maine Root ginger brew)
- 3 nobs of ginger (each about thumb-sized), peeled and chopped in half
- 3 tbsp sugar
- juice of 1 lime
- pinch of kosher salt
- ½ tsp powdered gelatin (see note)
for the vanilla nut cake
Adapted from Momofuku Milk Bar by Christina Tosi
- 230 g (2 sticks) butter, room temperature
- 500 g (2½ cups) sugar
- 120 g (½ cup) muscovado or dark brown sugar, packed
- 6 eggs
- 220 g (1 cup) buttermilk
- 150 g (1 cup) canola oil
- 25 g (2 tbsp) vanilla extract
- 370 g (3 cups) cake flour (see note)
- 8 g (2 tsp) baking powder
- 8 g (2 tsp) kosher salt
- 1 cup buttered or toffee or spiced nuts, roughly chopped (if you’d like to make them try this)
for the rum meringue buttercream
Adapted from Flour: Spectacular Recipes from Boston’s Flour Bakery + Café by Joanne Chang
- 1½ cups sugar
- 6 egg whites
- 1½ cups (3 sticks) unsalted butter, room temperature and cut into 2-inch chunks
- 1 tsp vanilla extract
- ¼ tsp kosher salt
- 8 ounces dark rum
- additional ingredients
- ½ cup salted peanuts
- ½ cup finely chopped crystalized ginger, plus more for garnish if desired
- fresh mint (optional garnish)
Instructions:
for the lime curd
Using a peeler or sharp knife, remove the zest from the limes, shaving off any residual white pith with a knife; slice the zest into strips and roughly chop and then place in a food processor with the sugar. Pulse until the zest is very finely minced, fragrant, and well incorporated. Squeeze the limes (you should get ¼ cup juice).
In the bowl of a stand mixer, cream the butter with the paddle attachment; beat in the lime sugar.
Add the eggs one at a time, then the juice, and salt. Mix until well combined.
In a medium saucepan, cook the mixture on low heat, stirring regularly with a rubber spatula, until thickened. The curd is ready when it coats the back of a spoon (this will take about 10 minutes).
Take care not to overcook or the curd will curdle. Remove from heat and refrigerate. (You should have about 1½ cups of curd.)
for the ginger beer syrup
In a medium saucepan, place the ginger beer, peeled ginger, sugar, lime, and salt; cook on medium high and adjust the heat as necessary to maintain a robust simmer. Cook for about 15 minutes or until the liquid has reduced by about two-thirds (you should end up with roughly a scant cup of syrup).
Add gelatin, stir, and refrigerate.
for the vanilla nut cake
Set the oven to 350 degrees. Butter, line with parchment paper, and butter again three 9-inch cake pans. In the bowl of a stand mixer, cream the butter and sugars with the paddle attachment on medium-high for 2 to 3 minutes. Scrape down the sides with a rubber spatula and with the mixer running on low add the eggs one at a time. Beat on medium-high for another 2 to 3 minutes. Scrape down the sides.
On low speed, slowly pour in the milk, oil, and vanilla. Mix for 4 to 6 minutes on medium-high until the batter becomes white and almost doubles in volume. Don’t skimp on time here.
Sift together the flour, baking powder, and salt. On low speed, add in the flour mixture until the batter just comes together. Scrape down the sides and mix with the rubber spatula to ensure all the flour has been incorporated.
Divide the batter among your three prepared pans. Give each a quick whap on the countertop to help disperse the batter. Divide your nuts evenly among the top of the pans and push down gently with a rubber spatula so they are mostly covered with batter. Bake for about 30 minutes or until the cake tops turn golden and their middles no longer jiggle (the edges should spring back slightly when gently poked).
Cool completely on a wire rack. Loosen each cake by running a knife along the edges and gently tapping the bottoms on the counter. Gently invert the layers and store in the fridge wrapped in plastic wrap until ready to use. (They can be made up to 5 days in advance.)
for the meringue buttercream and final assembly
Place a medium saucepan with a few inches of water on medium heat and allow to come to a simmer. In a medium heatproof bowl, whisk the sugar and egg whites. Place the bowl over the simmering water and whisk for 6 to 8 minutes or until the mixture gets hot to the touch and very foamy.
In the bowl of a stand mixer, place the heated foam mixture and whip on medium high with the whisk attachment for 6 to 8 more minutes or until the mixture becomes a light, white meringue consistency and is cool to the touch.
Turn the mixer speed to low and slowly add the butter chunks one at a time (it may initially look curdled; mix for about 2 minutes). Increase the mixer speed to medium and beat for 2 to 3 minutes more; it should start to look like buttercream at this point and should be smooth. Add in the vanilla and salt and about half the rum and whip until everything combines. Then slowly drizzle in the remaining rum, about 1 tablespoon at a time, waiting until it incorporates fully before adding more.
To assemble the cake, place three small pieces of parchment paper on top of a cake plate or serving platter; they should overlap slightly (you’ll remove them after you frost the cake; they are there to help reduce your mess). Select which cake layer you want for your bottom layer (reserve your best layer for the top) and invert so that the top of the cake is turned over on the parchment paper and the flat smooth bottom layer is facing up.
Using a pastry brush, spread about ½ the ginger syrup over the bottom layer and gently brush down the sides. The liquid will seep into the cake (unless you’ve opted for more gelatin, in which case you probably won’t want to put it on the sides and it shouldn’t seep into the cake). Top with half the curd. Sprinkle half the peanuts and minced ginger over the top. Then spread one-third of the buttercream on top.
Place the second cake layer on top of the frosting, again inverted so the smooth bottom is facing up. Spread the remaining syrup on top and down the sides. Spread on the remaining curd.
Sprinkle with the rest of the peanuts and ginger and top with more buttercream, reserving enough to frost the last layer. Top with remaining cake (this can either be inverted or with the top facing right side up, your preference; inverted will be flat and smooth while the top facing up will yield a slightly more rustic effect).
Using an offset spatula, frost the top with the remaining buttercream. (Dip the offset spatula occasionally in hot water to help ensure the top gets smooth.) You can fill in the side crevices with any leftover frosting, if you see fit, smoothing as you go. Garnish with additional crystalized ginger and mint, if desired.
Remove the parchment paper and transfer the cake to the freezer for at least an hour or so (long enough so the layers will set). Cover with plastic wrap and refrigerate for up to five days (or store for up to 2 weeks in the freezer). Let the cake warm up at least an hour before serving.
Makes enough for 12 to 16 people
Notes:
- I would suggest making the curd, syrup, and perhaps even the vanilla cake the day before you plan to assemble everything.
- I think the syrup would be even more interesting as a jelly. Next time, I plan to double the gelatin (at least). If you do this, let me know how it turns out.
- If you do not have cake flour you can use 2 cups plus ½ cup plus 2 tbsp all-purpose flour and ¼ cup plus 2 tbsp cornstarch. (The ratio is 2 tbsp cornstarch for every 1 cup flour, replacing 2 tbsp flour.)
- About the rum, I used Old Man Guavaberry rum from a recent family trip I took with my brother to Sint Maarten. (The below photo is from Karakter Beach bar and it is one of my favorites. The photo above is from another Sint Maarten beach, on a much stormier day.)