A Plum By Any Other Name

  • Stories
  • About
  • Recipes
  • Images

Buttermilk Buckwheat Beet Crepes: A Brief Tutorial

November 01, 2014 by Emily Gelsomin in For Herbivores, With Whole Grain

Here is what I know about about crepe making.  Do not attempt them under the following circumstances:

If you do not have a sturdy sauté pan.  (It does not have to be non-stick, but you cannot be evangelically opposed to butter.)

If you have had more than two cocktails.

If you have had any cocktail named as follows: the Boilermaker (postmodern hipster version: Dad’s Manhattan and a Rolling Rock); Wrath; Sheena Easton; anything that comes in a Scorpion Bowl.

If you are down to a single pair of knee-high orange stripped socks and are procrastinating the laundry.

If you have said, “I don’t know why I’m crying,” in the past twenty-four hours.

If you are ovulating.

If you are someone who angers easily about ovulation jokes.

If you are over thirty and have recently been asked why you aren’t married.  Give yourself two points if it was a relative.

If you have just listened to Seger’s “Turn the Page,” as covered by Metallica.

The point is crepes require your full attention.  Distractions will only complicate matters.  You must have your mental prowess. You must not be easily shaken by emotional shrapnel, housekeeping interference, or more than two fingers of whiskey.  For at least a good 30 minutes.

I know this because the day I finally nailed this recipe, I was as calm as the ocean is blue.  It took a few attempts to work out the kinks.  But it certainly didn’t help that prior efforts were on less than six hours of sleep, with laundry piling, and a plague of circling fruit flies with aspirations of biblical proportions.

Crepes can sense these sorts of things.  I swear they collapse on purpose.

But they are worth making.  For one, the recipe is vetted.  It involved a weird two weeks during which I ate beets daily.  We won’t talk about the aftereffects.  The dedication was apparent.

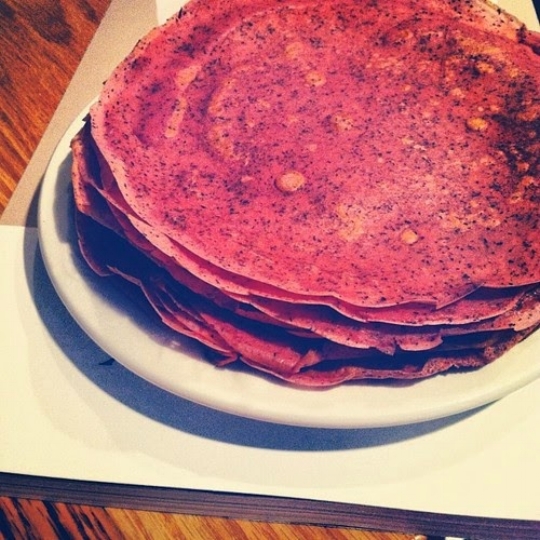
But these are simply beautiful.  They are fuchsia-colored with black buckwheat specks.  They don’t taste particularly beet-y, but they have a slight lingering earthiness and resilient chew. The buttermilk lends its tang and all of this taken together nearly threatens sensory overload, until you remember that you are eating a crepe.

Never mind the pink. Actually, totally mind the pink.  The pink is the point. Never mind everything else.

Buttermilk Buckwheat Beet Crepes

Ingredients:

  • 1 medium-large beet (about 3-inches), cooked and peeled
  • 1 cup buttermilk (have extra around if your batter needs a little thinning, see below)
  • 1/3 cup buckwheat flour, sifted
  • 2/3 cup all-purpose flour, sifted
  • 2 tsp sugar
  • 4 eggs
  • 2 tbsp butter, melted and slightly cooled, plus more for greasing the pan
  • scant ½ tsp kosher salt

Instructions:

Puree the beet in food processor, thinning it out with a little water (about ¼ cup) until the mixture starts to loosen slightly.  Using a wire mesh strainer, separate out the pulp; reserve the solids for another use.  You should get about 1/3 cup of liquid.  Pour the beet juice into a measuring cup.  If it’s just a little shy of 1/3 cup, simply add a bit more buttermilk than called for: you’ll need 1-1/3 cups total liquid between the juice and the buttermilk.

In a medium bowl, combine the liquid with the flours, sugar, eggs, melted butter, and salt; whisk together. Let the batter sit for an hour (this is important).

When you are ready to prepare the crepes, heat a 9-inch sauté pan on medium-high heat. Butter the pan, discarding any pooling fat.  Pick the pan up and pour 1/3 cup of crepe batter in the center of the pan and quickly swirl it with your wrist to evenly distribute the batter.  This will probably take a few crepes to get the hang of it. 

The crepe will cook for about 30 to 60 seconds (until it starts to look dry to the touch on the top side).  Using a rubber spatula, gently flip the crepe and cook for another 15 to 30 seconds.

Re-butter the pan, as needed (I did about every other crepe, wiping out the excess butter).

Repeat until the batter is gone. 

Makes about 10 crepes

Notes:

  1. Buttermilk provides a nice tang but it is a bit tricky to work with because brands have varying consistencies and some can make the batter a little thick.  If you want to avoid this altogether, just use milk. Ultimately, your crepe batter should be the texture of cream.  (I’ve thinned it out with a little water in a pinch, but it should also settle as it sits.)  Which reminds me: don’t neglect letting the batter sit, the crepes are easier to handle and hold together much better after resting. And hang tight, the first few crepes are typically troublemakers. 
  2. The crepes will last about four days in the fridge.  Or you can freeze them between pieces of parchment or wax paper for longer.
  3. To cook beets, I roast them in foil with some olive oil and salt at 425 degrees until they’re knife-tender.
     
November 01, 2014 /Emily Gelsomin
buckwheat, crepes, whole grain
For Herbivores, With Whole Grain
Tostones.jpg

Tostones: Slice, Soak, Fry, Smash, Fry

September 01, 2014 by Emily Gelsomin in Eat Vegetables, For Herbivores

As far as I can tell, there are a few helpful rules to follow when having company for dinner.  Salty pig parts rarely disappoint.  Dessert should be mandatory, for both hosts and guests.  And if you can fry something without making your companions feel as though everyone has entered the seventh circle of hell, you will be a champion.

Frying food is not easy.  It is violent.  Hot oil gurgles and bubbles and erratically catapults towards the stove, the walls, your eyes.  Always the eyes. 

I went through a phase in my twenties when I fried a lot of sad, white fish.  Tilapia was very cheap.  I was broke. Amazing what a saltwater soak, some Tabasco, and a double dip in flour could do. 

Though one time I served this fish camouflage with slightly raw insides to an old boyfriend’s family and everyone ate very quietly and politely while I melted into the carpet. Luckily, no one died.

The point is, I have the recipe written down somewhere in a splattered kitchen notebook.  It is worthy of company.  And I have not made it in over five years.  Because frying things—and I like to think I am not alone here—usually makes me feel like hell.

But this is not the case for all.  For instance, if you are a certain hot-blooded Puerto Rican, you might set down a plate of sexy fried things looking like you’ve just woken from a nap in a meadow.  Which is what happened when my friend Thais and her husband Dave invited me over for dinner a few months ago. 

Appropriate rules were followed.  They served a big, brilliant plate of bacon rice studded with peas and carrots and seasoned with culantro sofrito.  Collectively, dinner guests pillaged a quart of coconut ice cream.  And Thais taught me how to make tostones, and made it look effortless.

In truth, tostones really aren’t really a nefarious endeavor.  There is some oil splattering, to be sure, but no breading to deal with.  And the risk of involvement from the Centers for Disease Control is incredibly low.

They are made from green plantains, which are like starchy bananas.  Tossing them in oil makes them irrationally more redeemable than French fries—though just as addictive.  Essentially, you slice, soak, fry, smash, and fry again. 

And then you eat with a mayo or sour cream-based condiment of choice. Thais has childhood roots in mayo and ketchup.  I’ve fiddled with the addition of chili garlic sauce and lime.  Some minced fresh oregano would be lovely too, I’m sure.

Don’t let the sauce or the splatter deter you.  They can be made without too much difficulty.  You too can avoid the inferno.

Tostones

Ingredients:

  • 1 large garlic clove, minced
  • kosher salt
  • 3 green plantains
  • canola oil (enough to fill an inch or so up the sides of a pan at least 10 inches wide and 3 inches deep)
  • coarse sea salt (kosher works in a pinch)

Instructions:

Prepare a large bowl of water (temperature does not really matter, just not too hot or cold).  Add in the garlic and a few pinches of kosher salt. 

Take one plantain and, with a sharp knife, slice the peel lengthwise, cutting into the peel but not the flesh.  Cut two more lengthwise slits at equal intervals so the peel is segmented in three places (this will make it easier to remove).  Wedge your thumb under between the peel and the flesh of the plantain and gently slide it down to remove each section of the peel.  Repeat with the remaining plantains.

Cut the plantains into ½ inch diagonal slices and toss them into the seasoned water; let sit for at least 10 minutes or up to an hour. 

When you are ready to fry, pour the oil into a large, deep pan; fill at least 1 inch deep and heat on medium high.  (The oil is ready when it sizzles when a piece of bread is dipped in.)

Set in as many slices as you can without overcrowding the pan.  Turn them over when their bottoms turn bright yellow and start to get crispy; repeat with the other side (this will take about 3 minutes per side). 

One fried on both sides, place the slices on a large board and repeat with the remaining slices. 

After the first frying, use the bottom of a sturdy glass to press down heavily to smash each slice. 

Dip the smashed slices in water, press a few bits of salt on one side, step back to avoid the splatter, and then fry the slices again on both sides until crispy and golden (1 to 2 minutes per side). 

Makes about 15 or 20 tostones

Notes:

  1. This can be done with more than 3 plantains, but the amount listed is enough for 3 or 4 people to have as a snack.
  2. For this you do not want the yellow, ripe plantains; they’ll be too sweet.
  3. These are best the day they are made, but they can be warmed in 350 degree oven for 5 to 10 minutes.
September 01, 2014 /Emily Gelsomin
tostones, Puerto Rico, fried vegetables
Eat Vegetables, For Herbivores
foccacia.jpg

Rosemary Focaccia, Built to Roam

August 04, 2014 by Emily Gelsomin in For Herbivores

It is 8:13 AM.  On the street below a man is hosing down the entryway to a shrine for Saint Agrippina, garnished with over forty red roses.  There has been an Italian feast here in Boston’s North End, waging a war of sweets, meats, and muddied acoustics outside my window for days. 

The best way to describe it is to call to mind a state fair. The Great New York State Fair is my reference point.  Except picture more teeth and truncated consonants and swap out the secular wine slushies and spiedies for tents filled with blessed arancini balls and cannoli shells.

The smell of things fried in oil wafting up to a bedroom window may sound charming.  It can be.  The sound of when the moon hits your eye like a big pizza pie while cooking dinner may sound romantic.  It can be. 

The resonance of a cover of Donna Summer’s “Last Dance” at 10:15 PM when you are trying to sleep is neither charming, nor romantic.  Especially when it is not—in fact—the last dance of the evening.  Under the auspices of broken promises, the age of disco continues to rage for another half hour.

For most of July, I took things to the limit traveling up and down the northeastern coast to the Cape, Vermont, and Rhode Island.  Trampling across beaches, up mountains, and settling on green grass to listen to banjos and acoustic guitars.

truck.jpg

I mention this because during these weekends away from the city I have felt stronger, often on less sleep, and more booze. I also found myself reflecting a good deal as, I think, traveling tends to nudge. There are things to help this process if you are willing to listen and open wide.

Recently, this has included a Texas gentleman who goes by the name Shakey Graves.  I saw him in Newport last weekend at the epic folk festival. His gritty, soulful lyrics are matched by his lone guitar and suitcase kick drum.  I have not felt this way about music since I was thirteen and discovering The Beatles for the first time. 

The man can sing.

So sit back and watch me go
Bored and lazy
Yeah, watch me go, just passin’ through
Follow me beyond the mountain
Yeah go howl at the ol’ big moon
Oh strip them clothes right from your body
Dress your skin in sticks and stones
Doesn’t matter where we’re headed oh
Yeah cause some of us were built
Yeah, well, some of us were built
Yeah, well you know that some of us
Oh we were built to roam

So there’s that. 

There has also been this here focaccia that has done its fair share of traveling.  To Barnstable County accompanying pan-fried fish and a tomato casserole. 

To Newport alongside smashed avocado and six-minute eggs. 

To a motor lodge with cheese from a farm in Vermont with rosé drank from Styrofoam cups. To my beloved wineshop on Hanover Street because those wonderful folks deserve good bread.

It goes most places, easily. With pockets of olive oil in its open crevices.  Seasoned with pins from a spindly rosemary plant I have had for a scant decade.  It is soft, and chewy, and incredibly simple.  

The recipe is worth holding tightly to and the focaccia slab is suitable to share with as many people as you can.

I am not spiritual in the sense of god, or saints, or shrines.  But I do believe in the power of an acoustic guitar and of things made of flour and of heart.  And for me, right now, that is enough to fill a soul full.

Rosemary Focaccia

Adapted from The Wednesday Chef and Saltie: A Cookbook

Ingredients:

  • 6¼ cups (915 grams) all-purpose flour, sifted
  • 2 scant tbsp kosher salt
  • 1 tsp instant yeast
  • 3½ cups warm water (a little warmer than room temperature)
  • ¼ cup extra virgin olive oil, plus more for the pan and to drizzle overtop
  • pinch coarse sea salt
  • pinch red pepper flakes
  • 2 to 3 tsp minced fresh rosemary

Instructions:

the day before

In a large bowl, whisk together the flour, salt, and yeast. Add the warm water and stir until all the flour is incorporated and a sticky dough forms.  In a 6-quart container (the bowl of most Kitchen Aids will do) pour in ¼ cup olive oil.

Pour the dough on top of the olive oil and scoop a little oil that pools at the sides of the bowl over top. (It will look like you’ve made a terrible mistake here, the dough will be very loose, almost like porridge.)

Cover with plastic wrap and place in the fridge for at least 8 hours and up to 2 days (I average about 24 hours).  During this time, the dough will rise and puff up.

the day of

When ready to bake, take the dough from the fridge, oil a baking sheet (about 18 x 13), and pour the dough onto your prepared pan.  Using your hands, spread the dough gently out to the corners, or as close as you can get it. 

Let the dough rise until it roughly doubles in volume (about 1 hour).  It is ready when it is puffed up and spread out. 

Meanwhile, in a small bowl combine a tablespoon or two of olive oil with a pinch of red pepper and salt, plus the rosemary. 

Set the oven to 450 degrees. 

Make a number of indentations in the puffed dough with your fingers, like you are playing the piano.  Give the olive oil mixture a quick stir and drizzle it evenly over the top of the focaccia, allowing it to pool in the dimples created.

Bake for about 30 minutes, rotating the pan halfway through, until the top turns golden brown. Let cool on a wire rack and then cut into slices in the pan.

Makes enough for 12 sandwiches (or 24 narrow strips for snacking)

Notes:

  1. Start this recipe a day ahead.  This may seem annoying, but it is not a lot of work, and no kneading.
  2. The focaccia will last up to 2 days sealed in a plastic bag on the countertop.  If you won’t use all of it right away, it freezes brilliantly.  (If you want it for sandwiches, slice before freezing.)
  3. See Shakey sing "Built to Roam."
     
August 04, 2014 /Emily Gelsomin
newport, rosemary, focaccia
For Herbivores
  • Newer
  • Older

Copyright 2024